Below is a basic guide to help you easily add accounts and content to the MKT Care software. This is the first and essential step to start leveraging its powerful features for account management, auto-posting, and customer interaction. With just a few simple steps, you’ll quickly set up an automated system to save time and boost your marketing performance.If you want to buy please contact me Quang Hai MKT.
I.Add account
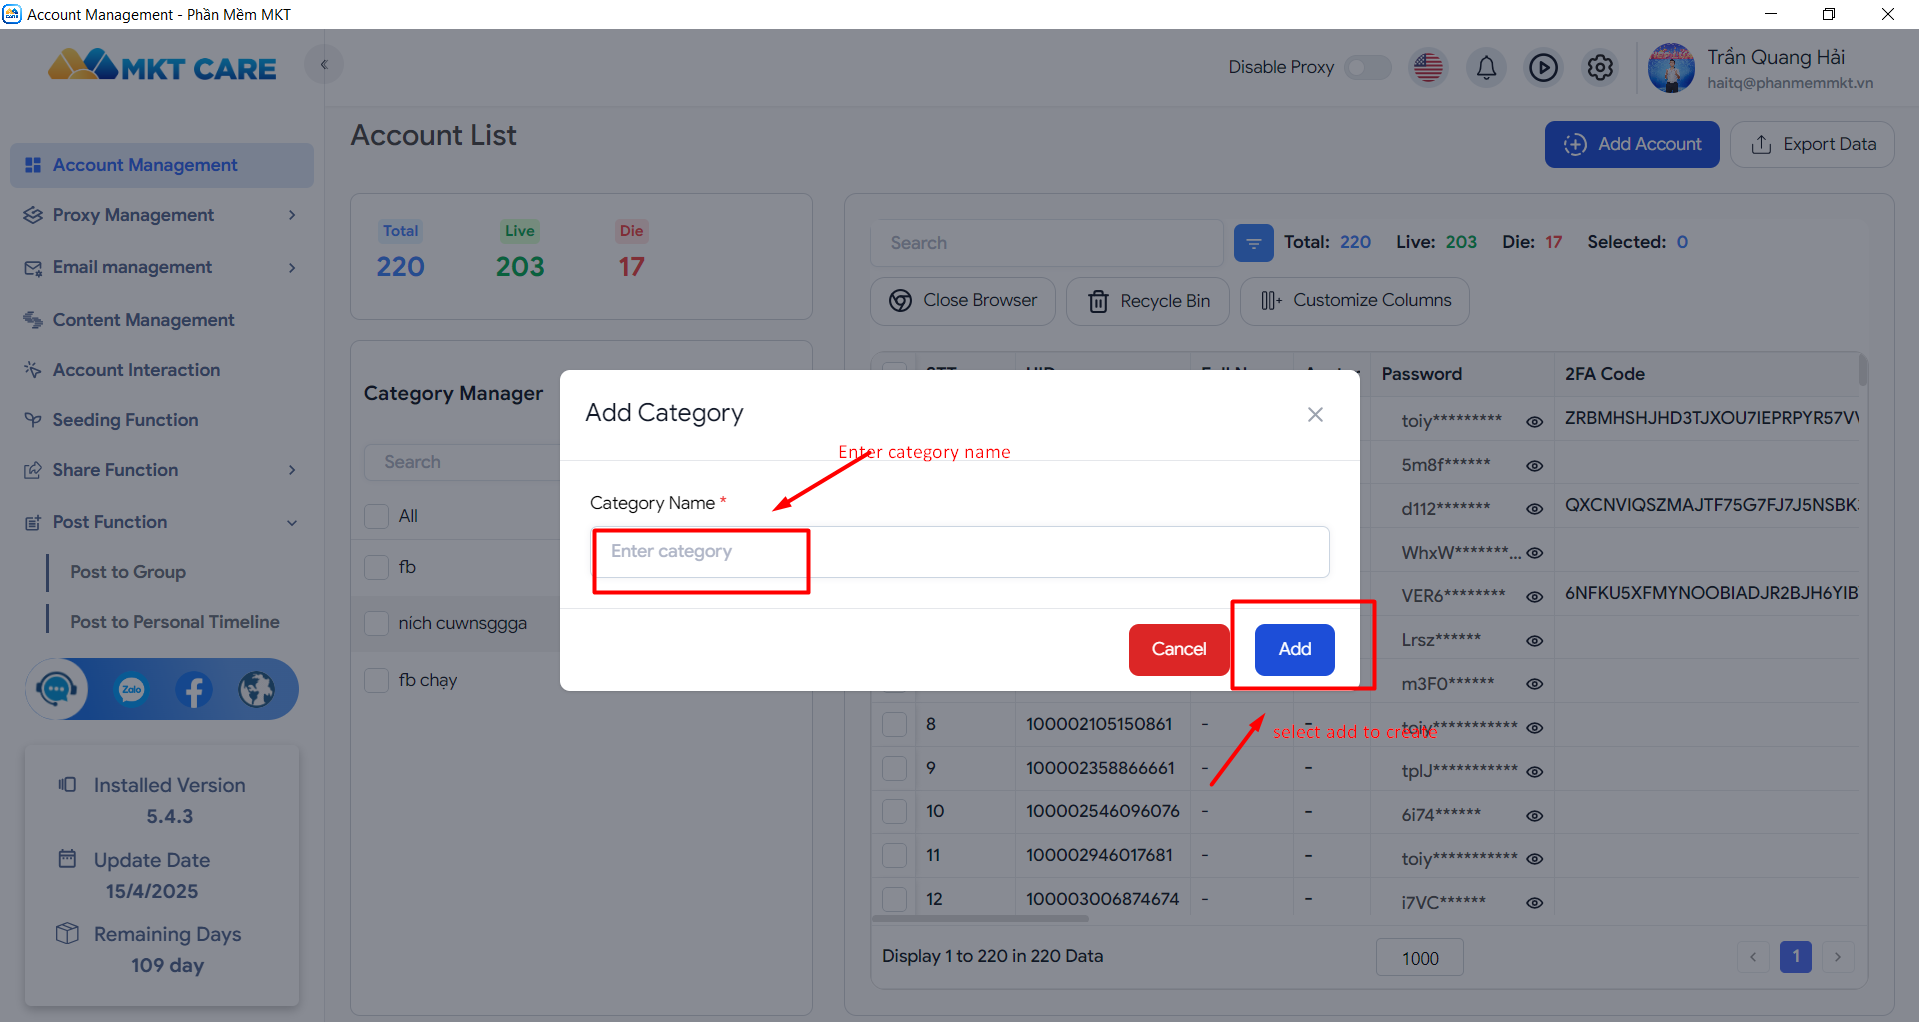
1.Add account category
The “Account Category Management” feature helps you easily classify Facebook accounts based on specific purposes and usage needs. This makes it more efficient to manage accounts, especially when handling a large number of them for various tasks such as account farming, interaction, promotion, or customer care.
Steps to follow:
Step 1: On the main interface of the software, select Account Management.

Step 2: Then go to Category Management and click Add.
Step 3: Enter the category name and click Save to complete adding the new category.
2. Add facebook accounts to Mkt care software
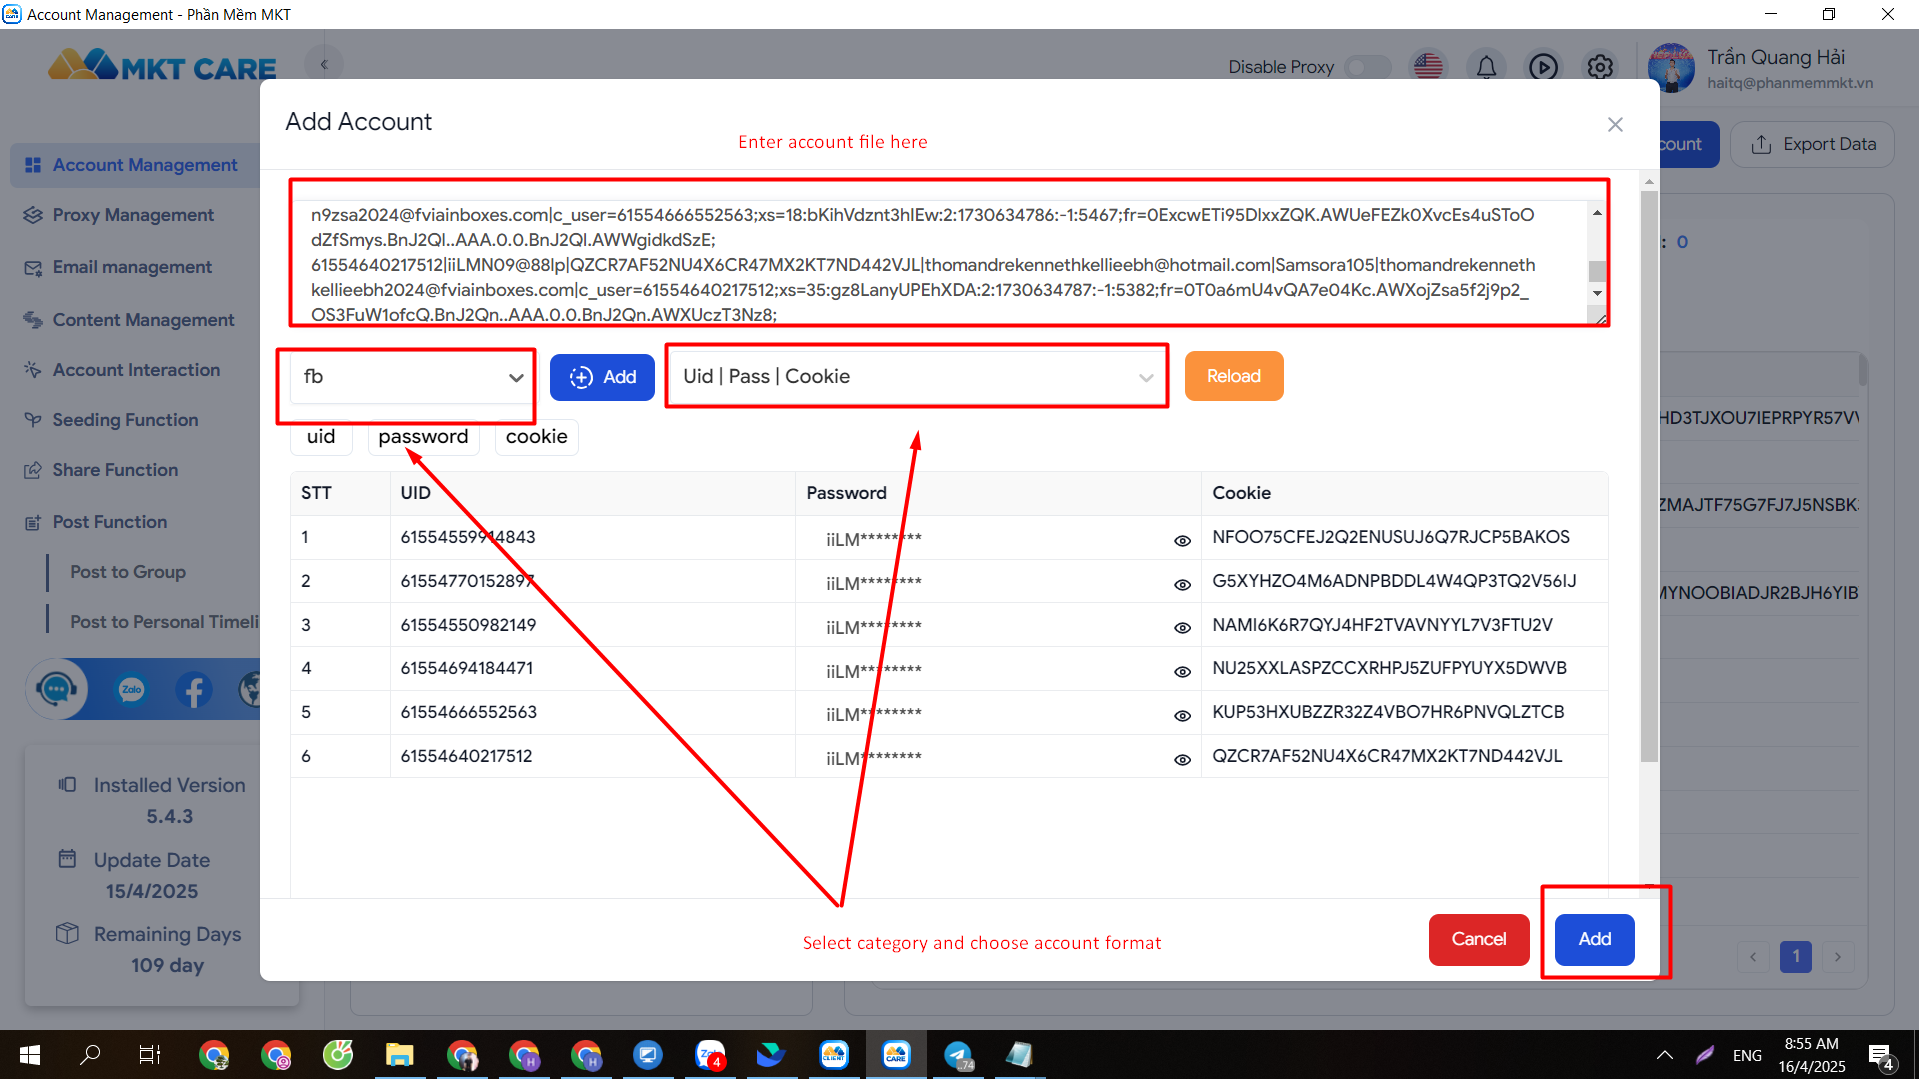
The “Add Account” feature allows you to easily add Facebook accounts to the software for management purposes, including large-scale account farming and interaction activities. This feature has no account limit, enabling you to efficiently manage all Facebook-related operations.
Steps to follow:
Step 1: On the main interface of the software, select Account Management.
Step 2: After creating a new category, click Add Account.
Step 3: Paste the account format you have into the data field.
→ Enter the account information.
Step 4: Choose the correct account format (UID, Password, 2FA, Email,
Email Password, Recovery Email, etc.) depending on your account file. Make sure to match the format correctly. Then, select the category to save the accounts into.
Step 5: Click Add to complete the process of adding accounts.
II: Add Content
1. ADD content management category
The “Content Category Management” feature allows you to classify posts into specific groups based on different purposes and tasks. This helps you organize, search, and manage posts more effectively, while also optimizing your content strategy for each targeted goal.
Steps to follow:
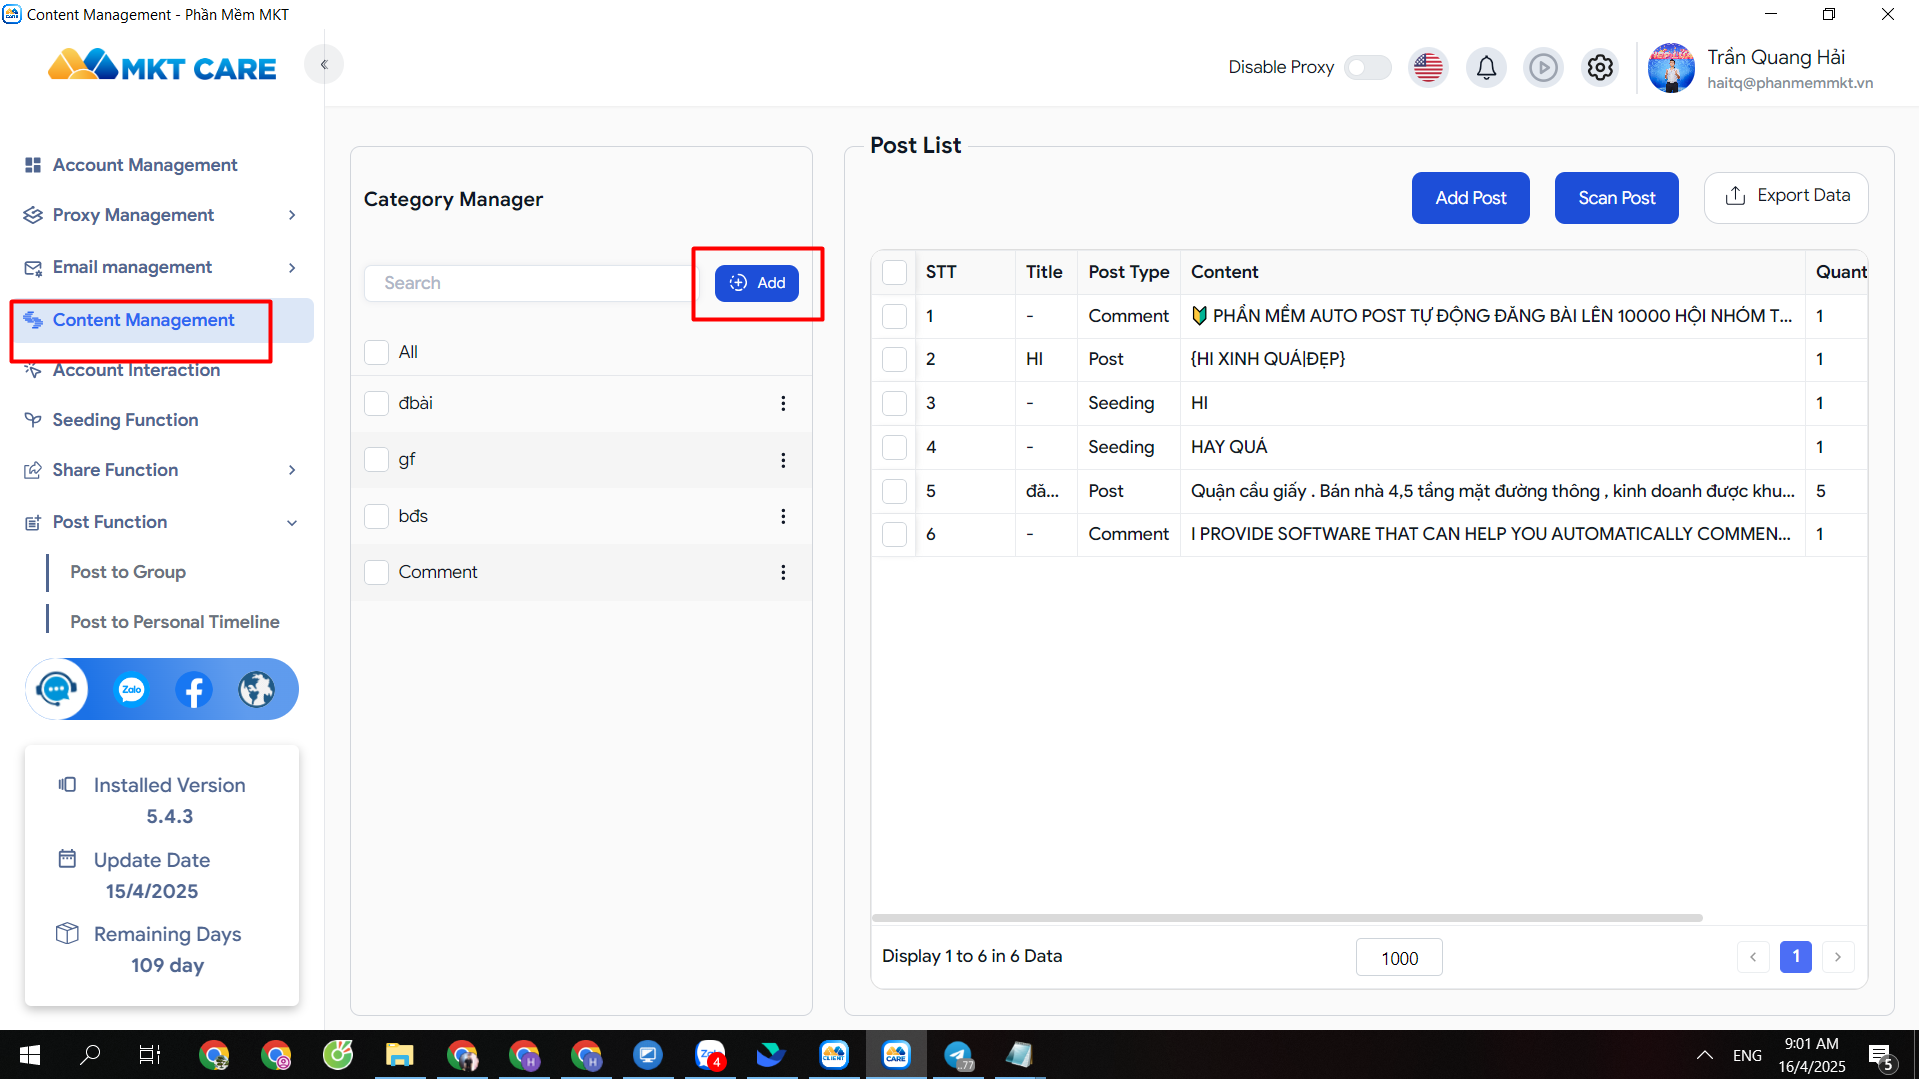
Step 1: On the main management interface, select Content Management.
Step 2: In the Category Management section, enter the Category Name in the input field.
Step 3: Click Add to create a new category based on your specific needs.
Note:
The added category will help you easily sort and manage content according to specific purposes.
You can add as many categories as you like to meet your content organization and data management needs.
2: Add a Post
The “Add Post” feature allows you to easily create content tailored to specific purposes such as account farming, increasing interaction, or supporting marketing campaigns.
Steps to follow:
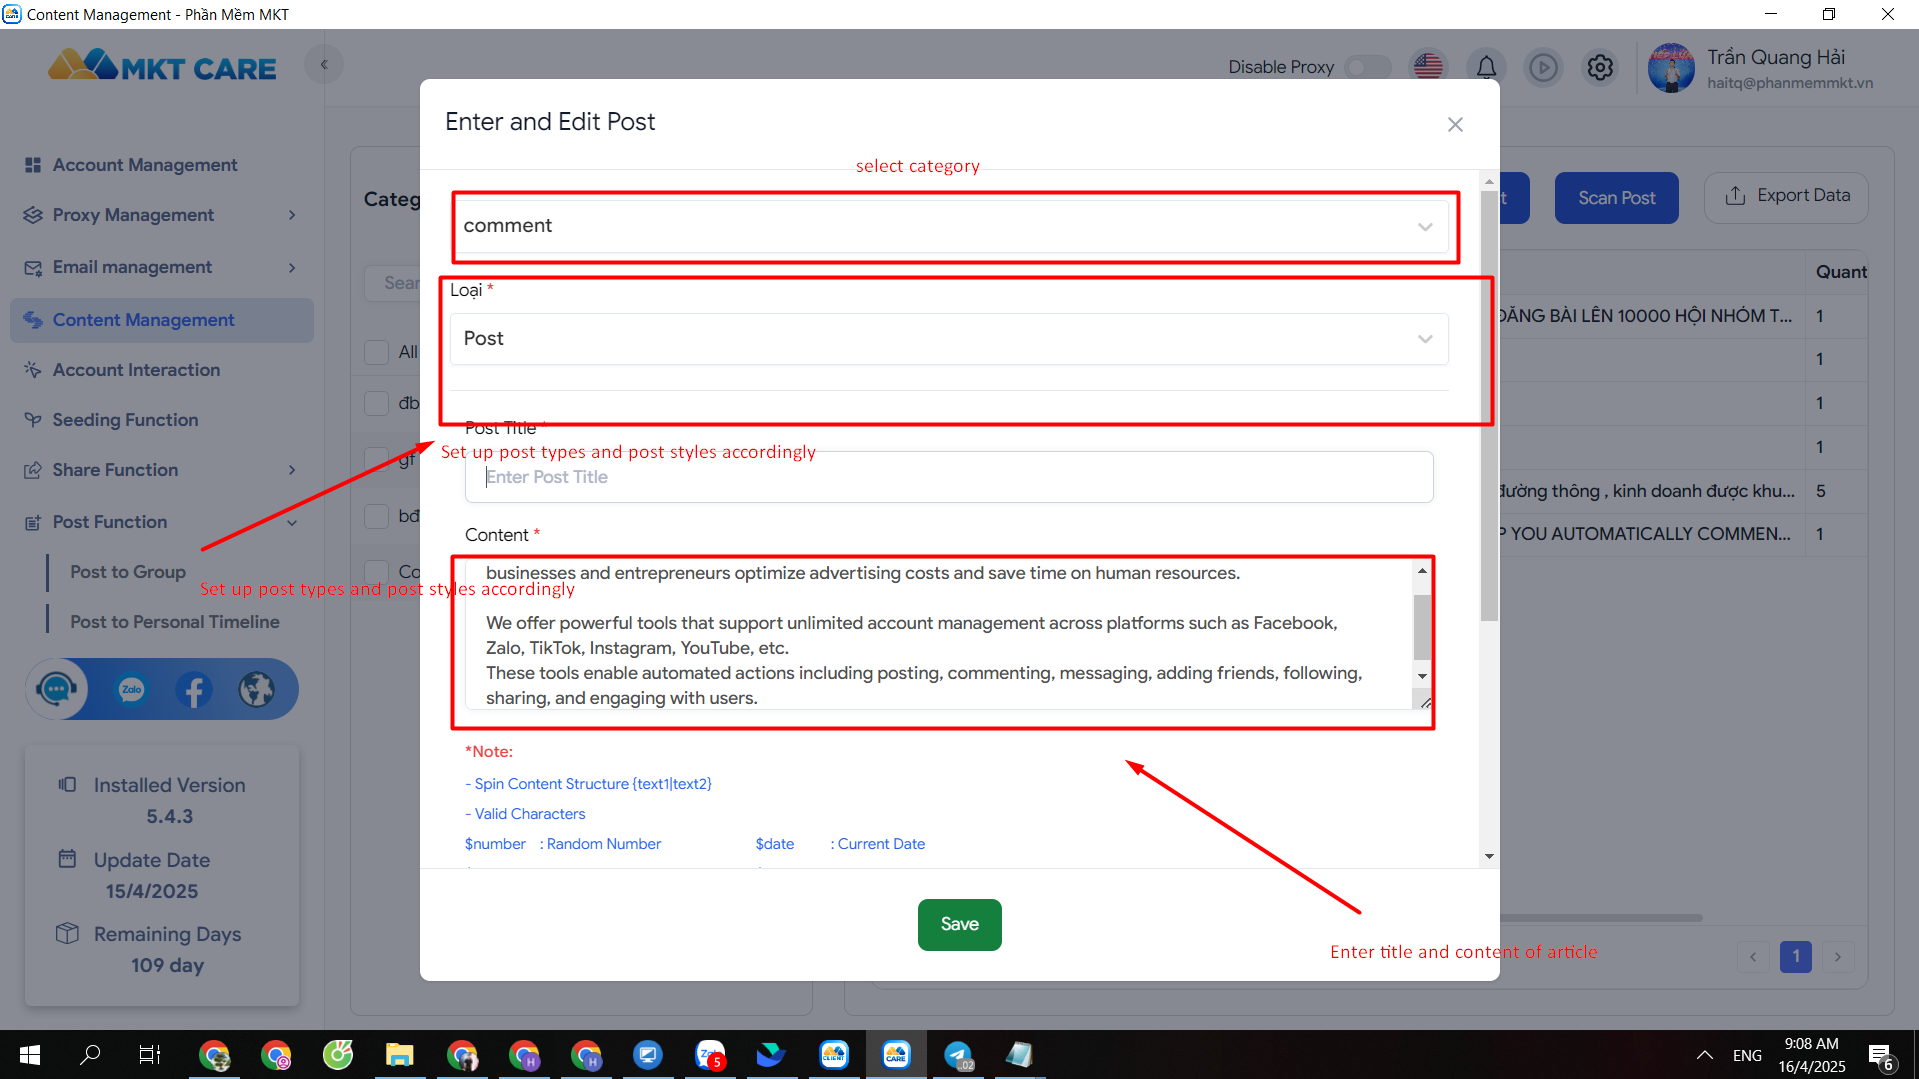
Step 1: On the main management interface, select Content Management.
Step 2: After creating a category, click Add Post. Here, you will need to select:
-
Category
-
Post Type (Text, Image, etc.)
-
Post Format (Post, Comment, etc.)
-
Post Title and the content that fits your posting needs.
Step 3: Click Save to complete the process of adding a new post.
Note:
You can create multiple posts with different types and formats under each category to manage your content based on specific requirements.
Make sure to select the correct post type and post format to ensure optimal content organization and management efficiency.
VIDEO DEMO AUTO POST<
- Hotline: ADMIN : QUANG HẢI MKT : + 8439.2426.840
- Youtube : Quang Hai Software – Hai Tools Marketing
- Whatsapp : (+84) 39 2426840 – Quang Hải MKT
- Telegram : @tquanghaimkt
- Fanpage : mkt auto software